Hello foodies,
Today is pastry day, and I’m excited to take you on a culinary journey to the United States!
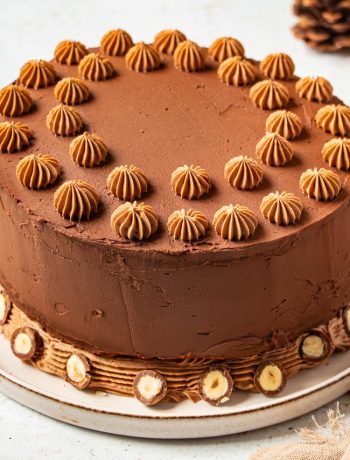
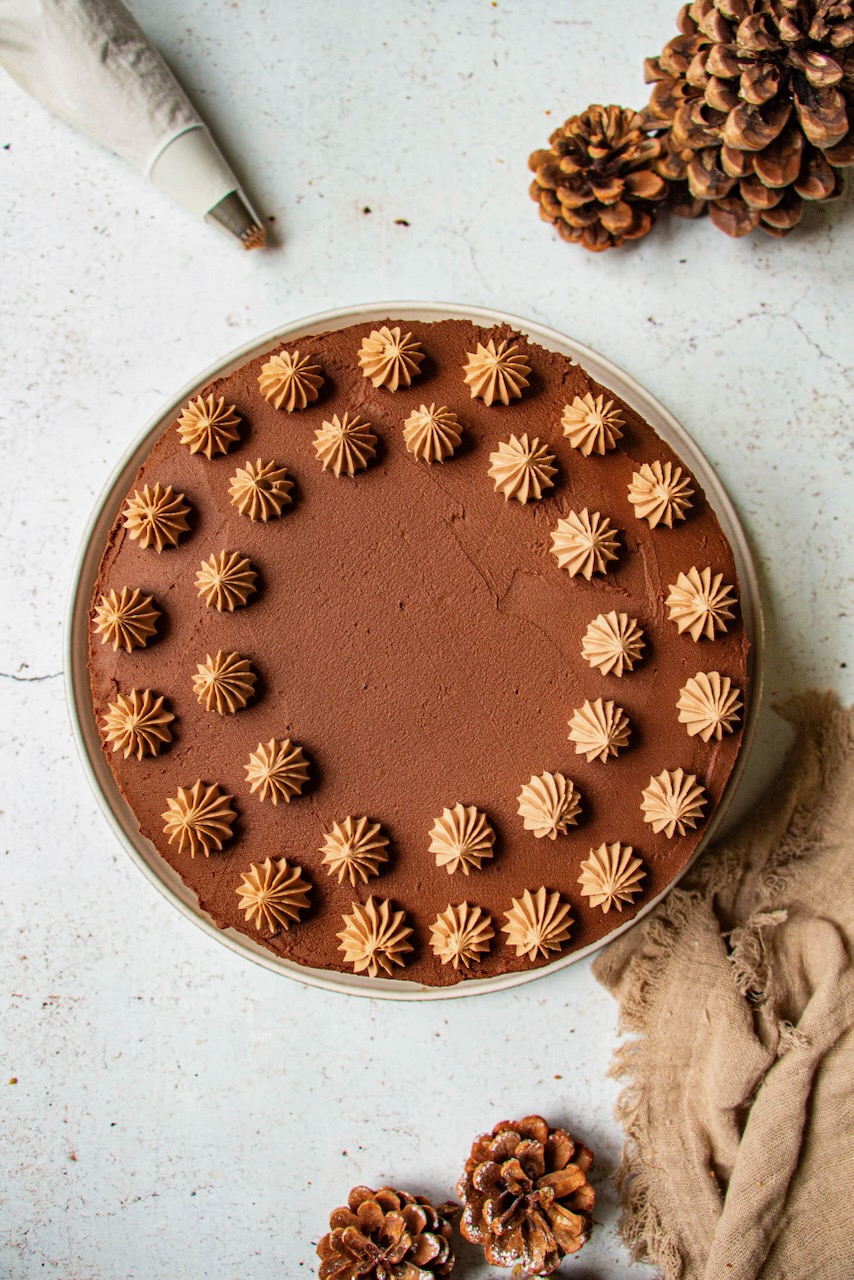
We’re going to make a delicious chocolate pear layer cake!
Why this chocolate pear layer cake recipe?
A few weeks ago, it was my youngest’s birthday. She had planned a small party with friends, and naturally, she called on the services of Casserole & Chocolat to delight the taste buds of her guests! 😉
Her request was clear: « Mom, I would like a layered cake made with chocolate. » Well, of course, my dear! I will make that for you! To add a touch of freshness, I’m going to incorporate some pear. The combination of chocolate and pear is a classic winner!
My « organization » tips for making your chocolate pear layer cake
To create this chocolate pear layer cake, organization is key. Here are my recommendations:
The day before, prepare the chocolate ganaches.
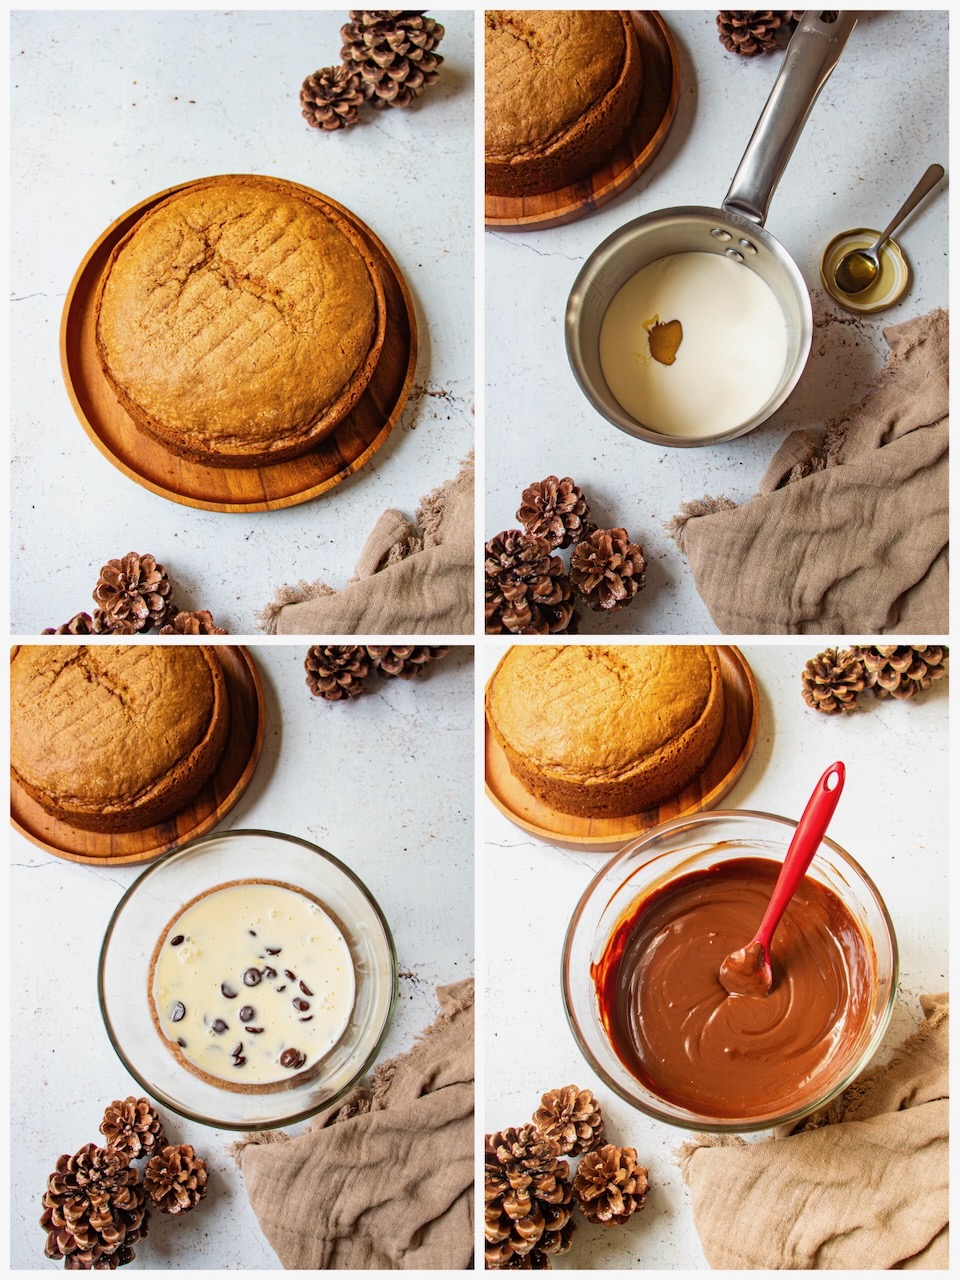
Also, the day before, bake the Molly cake. Once it has cooled, wrap it in cling film to ensure it remains moist and doesn’t dry out. This step is crucial.
In the morning, prepare your pears and the chocolate-coated hazelnuts.
After that, you can move on to the assembly!
Remember that your chocolate pear layer cake will need to chill in the refrigerator for an hour after assembly.

Molly cake: the ideal base for a layer cake
To create a moist and well-structured layer cake, the right base cake is essential. Among the many options in pastry, the Molly cake is often regarded as one of the best bases for layer cakes. Its texture is both moist and firm enough to support multiple layers of cream or ganache.
Thanks to its dense yet airy crumb, the Molly cake can be cut into even disks, allowing for clean and stable assembly. This is why it is widely favored for birthday cakes, layer cakes, and decorated desserts.
The origin of the layer cake
The layer cake is a spectacular dessert composed of several layers of sponge or biscuit layered with creamy fillings. Extremely popular in American pastry, it is characterized by its generous appearance, delightful textures, and often impressive decorations. Today, the layer cake has become a symbol of festive and creative baking.
The origins of the layer cake can be traced back to the 19th century in the United States. With the rise of home ovens and improved baking techniques, cooks began to bake multiple cake layers separately, stacking them with creams, jams, or frostings for a taller, more indulgent, and visually striking dessert.
The main varieties of layer cake
Over time, a plethora of layer cake varieties have emerged. Among the most famous are the Red Velvet Cake, known for its striking red color and creamy frosting, and the Carrot Cake, beloved for its spicy flavors and soft texture. Modern pastry chefs also offer layer cakes in various flavors, such as chocolate, vanilla, red fruits, or lemon.
By the way, feel free to check out my Halloween layer cake or my chocolate praline Easter layer cake!
On what occasion is a layer cake served?
The layer cake is especially tied to special occasions, frequently served at birthdays, weddings, and family gatherings, as its generous size allows for easy sharing among many guests. Plus, its decorative allure makes it a stunning centerpiece on festive tables.
Today, layer cakes are enjoying considerable popularity in bakeries and on social media. Their elegant presentation and versatile flavor combinations make them a dessert that is both indulgent, creative, and perfectly suited for celebration.
The necessary utensils for your chocolate pear layer cake:
– A food processor,
– Or a large bowl with an electric whisk,
– A 20 cm (8-inch) ring or mold with high edges (like my surprise high bread circle from De Buyer),
– A spatula,
– Baking paper,
– A cake leveler,
– A straight spatula,
– A piping bag,
– And a fluted nozzle for decoration.
Well, I think I’ve covered everything! Are we ready to dive into making a wonderfully indulgent chocolate pear layer cake?
The recipe, Chef!
Chocolate Pear Layer Cake
 ( Vote !)
Ingredients
- Dark chocolate ganache
- 270 g of dark chocolate
- 50 g of butter
- 150 g + 400 g of heavy cream
- 3 teaspoons of honey (15 g)
- Milk chocolate ganache
- 90 g of milk chocolate
- 50 g + 150 g of heavy cream
- 1 teaspoon of honey (5 g)
- Molly cake
- 3 large eggs
- 350 g of sugar
- 350 g of flour
- 350 g of heavy cream
- 1 packet of baking powder (11 g)
- Finishing
- 2 pears
- 10 chocolate-covered hazelnuts
Instructions
Dark chocolate ganache
Pour 150 g of cream into a small saucepan and add the honey.
Heat. Stop as soon as it boils.
Add the dark chocolate, butter, and mix.
Then add the 400 g of cold cream and mix well.
Cover with film (cover the preparation with cling film without leaving any air bubbles between the preparation and the film).
Set aside in the refrigerator for at least 4 hours.
Milk chocolate ganache
Pour 50 g of cream into a small saucepan and add the honey.
Heat. Stop as soon as it boils.
Add the milk chocolate and mix.
Then add the 150 g of cold cream and mix well.
Cover with film (cover the preparation with cling film without leaving any air bubbles between the preparation and the film).
Set aside in the refrigerator for at least 4 hours.
Molly cake
Preheat your oven to 150 degrees.
Put the eggs and sugar in the bowl of the robot and whisk until you obtain a well frothy mixture that has doubled in volume (this takes several minutes).
Add the flour and baking powder gradually until you obtain a well homogeneous mixture. Set aside.
Whip the whole cream into whipped cream (unsweetened) and gently add it to your preparation with a spatula.
Pour into your mold lined with parchment paper and bake for 1 hour and 30 minutes.
At the end of the cooking, leave it in the closed and turned off oven for a few minutes after checking the cooking with a knife.
Unmold the molly cake upside down on a sheet of parchment paper and let cool. (the top of the cake on the parchment paper to flatten it as much as possible).
Assembly
Put the bowl and whisk of your robot in the freezer for a few minutes.
When the bowl is very cold, pour the milk chocolate ganache into it and whisk until you obtain a well firm and quite compact ganache.
Set aside in the refrigerator.
Proceed in the same way for the dark chocolate ganache.
Cut the molly cake into 3 slices (I keep the bottom of the molly cake for the top of the layer cake to have a straight level).
Place the base of your layer cake on your serving platter. Fill with whipped dark chocolate ganache.
Add slices of a previously peeled pear.
Place the middle layer of molly cake, fill with ganache.
Add slices of the second previously peeled pear.
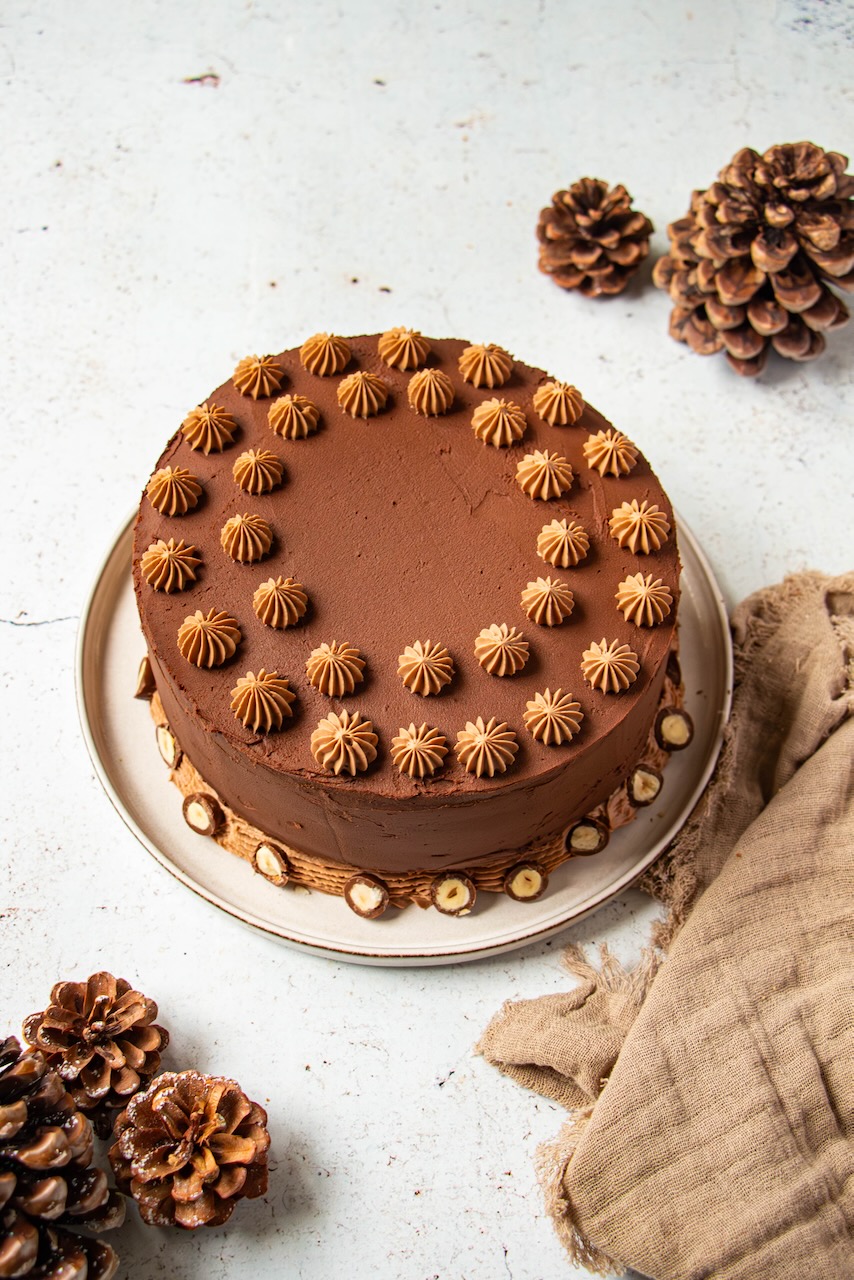
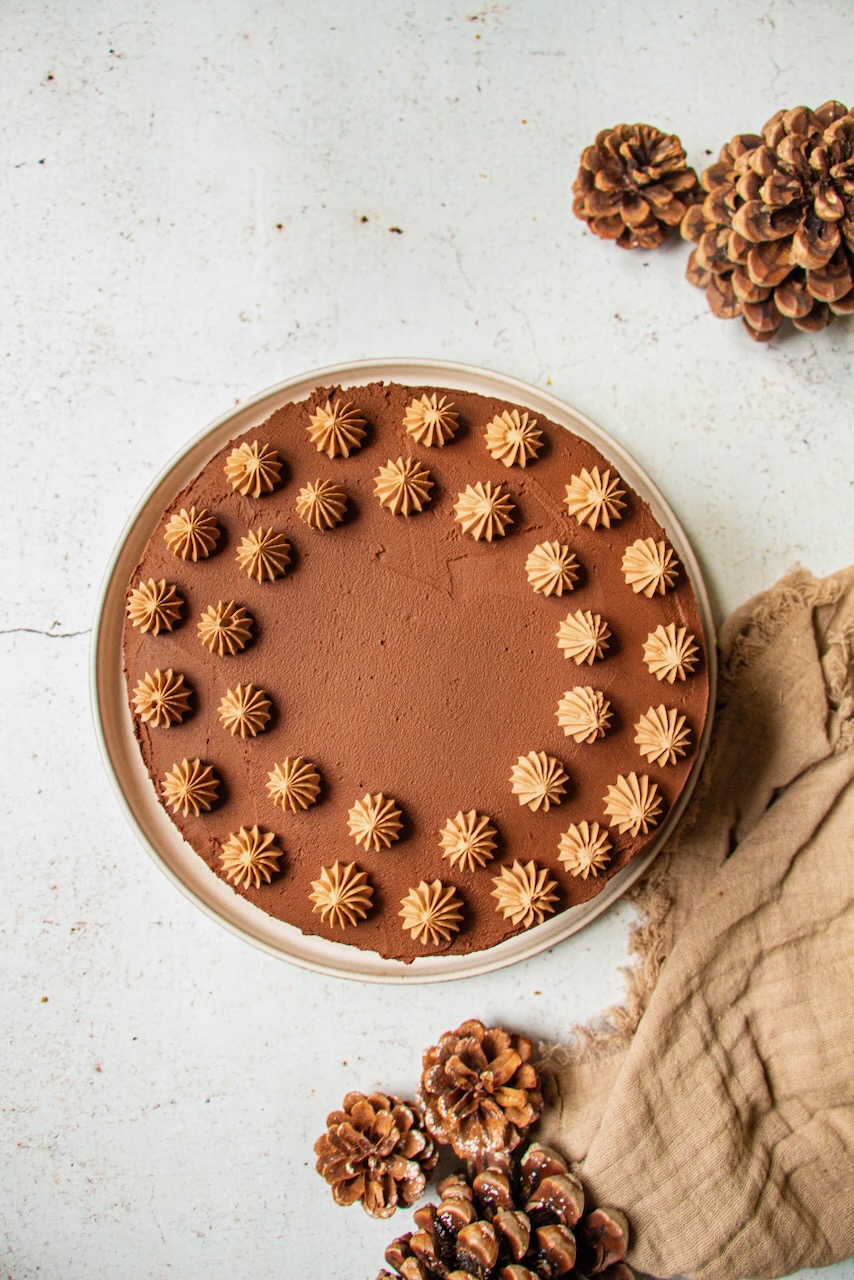
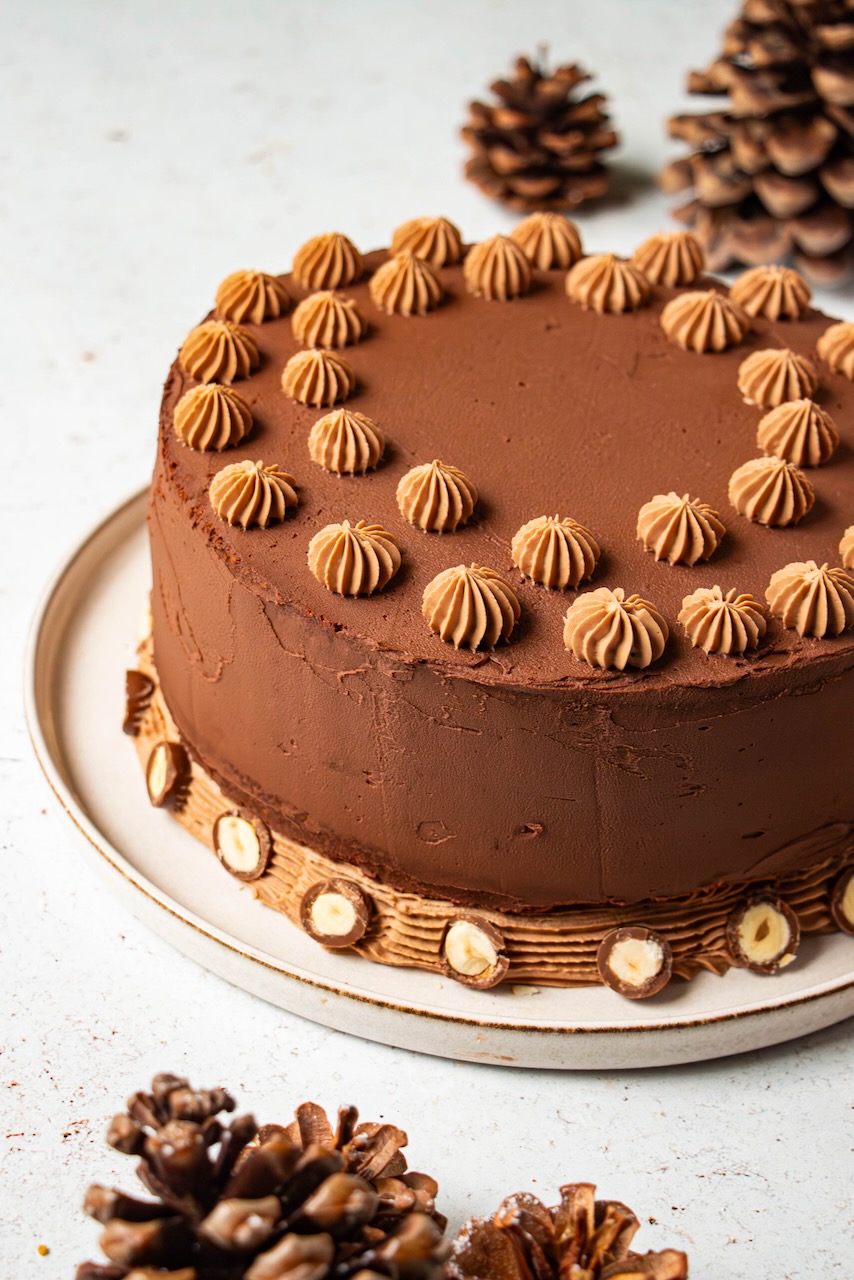
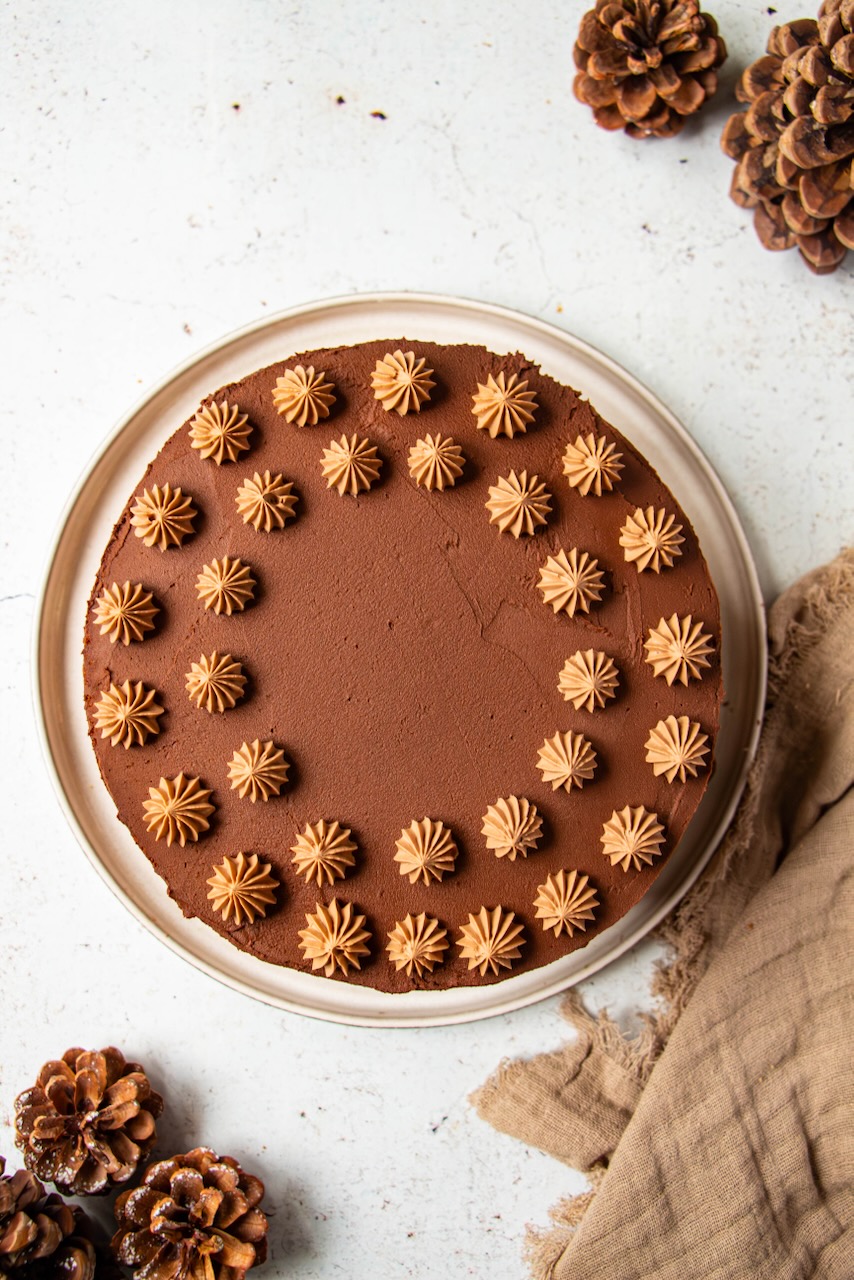
Finally, put the third layer of molly cake, cover the top and sides with the remaining ganache.
Using a straight spatula, smooth the ganache on the top and sides. (Do not hesitate to put it back in the fridge if the ganache softens).
Pipe the whipped milk chocolate ganache at the base of the molly cake and on top.
Cut your chocolate-covered hazelnuts in half and place them on the band of whipped milk chocolate ganache at the base of the cake.
Set aside in the refrigerator until tasting.
No Comments